Tables In HTML How To Create And Add Bullets And Numbers In HTML

Tables In HTML How To Create And Add Bullets And Numbers In HTML

HTML Symbol
In the past few articles I have discussed many things about HTML Coding, like Adding Images and Music, Creating Hyperlink and All That. In this Article I will Concentrate upon the following Two Topics i) How To Create list of Sentenses like Bullet and Numberings. and ii) How to Create a Table in HTML. If you don’t know anything about HTML then start learning as it’s very esy and it wouldn’t take so muxch time just visit my previous articles about HTML from the Start.
  • Now we shall proceed with our current article Topic. I will discuss about above mentioned two toipics in this article one by one. So just lets get started :

    How To Create Bullets and Numbering in HTML :

    Sometimes we need to add Bullets or need to add numberings to our texual content, most probably for describing a procedure step by step.This is also known as listing of texual content.In HTML we can do this kind of listings.Basically in HTML there are two different types of listing, one is Ordered Listing which consists of Numbers and the another one is Unordered Listing which consists of Bullets. As it’s already known to us that to perform each kind of task in HTML there are different typs of Tags to be used.I will now show you each type of Listing one by one.We must place the Listing Tags always in between the Font Tag (Between The <font color=”xyz” color=”abc”> and </font>) .
    Ordered Listing ====> The Ordered Listing means that each of the listed items will be ordered in Numerical Order like 1)   2)    3). . . . . The Tag used for Ordered Listing is <ol>, in the process of listing you don’t need to close any tag with / sign. The Tag <ol> only declair that the listing that takes place after the Tag will be in a Numerical manner. But we need to use another Tag that is <li> to list each Item. after the Order Listing Tag that is <ol> in a new line the first item is to be written with a <li> Tag before writing the item. Then in the next line starting with another <li> Tag we must write the second item and in the next line starting with another <li> Tag the third item is to be written and so on………
    Example :-      <ol>
                          <li> First Item/Point
                          <li> Second Item/Point
                          <li> Third Item/Point
    Unordered Listing ====> The Unordered Listing means that each of the listed Items or points will be ordered with Bullets. The Tag used for Unordered Listing is <ul> , and rest of the part is all same just like Ordered listing, thus to add Bullets before each Item you need to add the <li> before swriting each Items or points on new lines each.And here also no need to close the Tag with / sign.
    Example :-      <ul>
                          <li> First Item/Point
                          <li> Second Item/Point
                          <li> Third Item/Point
    We can use both the Ordered and Unorderd Listing one after another continuously.
    Example :-      <ol>
                          <li> First Item/Point
                          <li> Second Item/Point
                          <li> Third Item/Point
                          <ul>
                          <li> First Item/Point
                          <li> Second Item/Point
                          <li> Third Item/Point
    We can create a webpage in HTML and also put this Type Of Listings There.
    Example :- 
    <html>
    <head>
    <title>
    Test Page
    </title>
    </head>
    <body bgcolor=”Blue”>
    <img src=”D:HTML ProjectCodingProcessor 2.jpg” align=”right”/>
    <font color=”Green” size=”6″>
    <h1>HTML Power</h1>
    </font>
    <font color=”Red” Size=”4″>
    <ol>
    <li>Mobile Phone
    <li>SIM Card
    <li>Recharge
    <ul>
    <li>Computer
    <li>Printer
    <li>Internet<br>
    <b><i><u>Hi I’m a Newbie to HTML and this is My first created Webpage</u></i></b><br>
    <i>I Like Using HTML to create my Own Webpage</i><br>
    </font>
    <a href=”D:HTML ProjectCodingHardware.html”>Hardware</a>
    <bgsound src=”D:HTML ProjectCodingHome Page.mp3″ autostart=”true” hidden=”true” loop=”10″>
    </body>
    </html>

    Creating Table In HTML :

    In  Few cases it’s better and proper to show information in Tubuler Format. We can construct Tables in HTML for our Webpages. Creating table in HTML requires a lot of Hard Work and concentration as it you would have to write the same thing again and again with just a little modification in order to construct a Table. To get started we first need to know some Tags with their functions which we will need in order to Construct a Table in HTML. All Tags must be in between the Font Tags
    ·                     <table height=”##” width=”###” border=”#”>  ====> This Tag is used to create a table and to declair that you are going to construct a table, this Tag is written first. Here height, width, border means the height , width and border of the each cell of table.In places of ### , ## and # use proper number of size. The closing Tag is </table>
    ·                     <th> ====> This Tag is used to give the Table Headings, each Headings is given one after another in a new line starting with this Tag. The closing Tag is </th>
    ·                     <tr> ====> This Tag is used to declair that a new row is being Constructed. The closing Tag is </tr>
    ·                     <td> ====> This Tag is used to give the Table Data or the Data which are to filled with the cell under a table row. Each of the cell is declaired with data by starting each Data with <td> Tag and each cells data is written in a new line or one after another starting with <td> Tag. The Closing Tag is </td>

    Now we should understand the relation from the above that, Under a Table there first the Table Starting Tag needs to be given then we need to declair the Table Headings with Table Head Tag, After the Table Headings are done we need to create the first row of the table by Table Row Tag (<tr>) and the under this Table row we need to construct the each Cells under that row with Table Data Tag that is <td>, the number of cells in a row is equal to the number of Taable Headings given.After filling up all the Table Data Cells we need to close that first row with Closing Tag for Table Row (</tr>) then we have to create new rows as required by the above methode, and ultimately when all required rows are completed then we need to Comple the Construction of the Table by Closing the Table Tag that is </table> .
    Example :-     
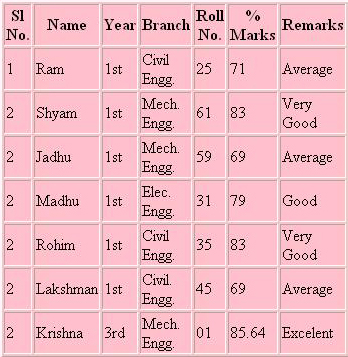
    <table height=”1″ width=”1″ border=”2″>
    <th>Sl No.
    <th>Name
    <th>Year
    <th>Branch
    <th>Roll No.
    <th>% Marks
    <th>Remarks
    <tr>
    <td>1</td><td>Ram</td><td>1st</td><td>Civil Engg.</td><td>25</td><td>71</td><td>Average</td>
    </tr>
    <tr>
    <td>2</td><td>Shyam</td><td>1st</td><td>Mech. Engg.</td><td>61</td><td>83</td><td>Very Good</td>
    </tr>
    <tr>
    <td>2</td><td>Jadhu</td><td>1st</td><td>Mech. Engg.</td><td>59</td><td>69</td><td>Average</td>
    </tr>
    <tr>
    <td>2</td><td>Madhu</td><td>1st</td><td>Elec. Engg.</td><td>31</td><td>79</td><td>Good</td>
    </tr>
    <tr>
    <td>2</td><td>Rohim</td><td>1st</td><td>Civil Engg.</td><td>35</td><td>83</td><td>Very Good</td>
    </tr>
    <tr>
    <td>2</td><td>Lakshman</td><td>1st</td><td>Civil. Engg.</td><td>45</td><td>69</td><td>Average</td>
    </tr>
    <tr>
    <td>2</td><td>Krishna</td><td>3rd</td><td>Mech. Engg.</td><td>01</td><td>85.64</td><td>Excelent</td>
    </tr>
    </table>
    This above coding above with all required coding to create HTML file will show a Table like below :
    Table Created Using HTML

    I Hope this article Helped You. Please do leave Comment(s) for any Questions or Suggestions, Any Comment(s) will be highly appreciated.Have Goof Day.


Follow Techno Genome at :-

How To Add Image ,Music And Hyperlink In HTML

How To Add Image ,Music And Hyperlink In HTML

HTML Logo
Hey Welcome Back. In the previous article about HTML I’ve discussed about How to make a Webpage using HTML, that was a simple only Textual based Webpage. In this article I will give a brief Tutorial about How to add Images, Music and Create a Headline and How to embed an Object on your created Webpage with HTML.
We should learn one by one, but at first if don’t know about How to create a Webpage with HTML then just read my Previous Article

it’s really easy to create one using HTML, and most of all you will create it by your self not with the help of tools thus you can be surely proud of your self. Now I’m going to show you How to add some multimedia to your webpages.

Adding Images To your Webpage In HTML :

A article can surely look much attractive if we can add some visuals relative to our articles. You can add images to your webpages by using HTML. The Tag needed to add a image to a article is <img src=”full path of the image” align=”xyz”/> . In the Tag the src means the source of the image file to add and align declares the position of the picture. in the place of the full path of the image the full path of the picture location including the extension of the image file must be given, and in the place of xyz the position at where you want to place the image on the webpage should be given like right, left, center .
Example :- <img src=”D:HTML ProjectCodingProcessor 2.jpg” align=”right”/>
In the previous article we have created a simple webpage using HTML, the coding was :
<html>
<head>
<title>
Test Page
</title>
</head>
<body bgcolor=”Blue”>
<font color=”Green” size=”6″>
<h1>HTML Power</h1>
</font>
<font color=”Red” Size=”4″>
<b><i><u>Hi I’m a Newbie to HTML and this is My first created Webpage</u></i></b><br>
<i>I Like Using HTML to create my Own Webpage</i>
</font>
</body>
</html>

Now this webpage only shows a text in the Body part of the webpage Hi I’m a Newbie to HTML and this is My first created Webpage .
Now lets assume that we want to add a image before the text and the image is to be placed at the right side of the page. To do this we need to put the Image Tag just before the Font Tag, and like other cases this Tag also must be written on a new line. Thus the Codings will look like below :
<html>
<head>
<title>
Test Page
</title>
</head>
<body bgcolor=”Blue”>
<font color=”Green” size=”6″>
<h1>HTML Power</h1>
</font>
<img src=”D:HTML ProjectCodingProcessor 2.jpg” align=”right”/>
<font color=”Red” Size=”4″>
<b><i><u>Hi I’m a Newbie to HTML and this is My first created Webpage</u></i></b><br>
<i>I Like Using HTML to create my Own Webpage</i>
</font>
</body>
</html>

Adding Music To Your Webpages In HTML :

Hummmm!!!!!!!! . . . .wouldn’t it be interesting to ad some music to your webpages which spices up you webpage a bit more. Adding Music to your Webpages that blends well can make it more soothing and different from others, Yessss you can surely add music to your webpage by using HTML and it’s as esy as to read this few lines. So lets get Started. The Tag used for adding music to your webpage by using HTML is <bgsound src=”Full path of the music” autostart=”x” hidden=”x” loop=”#”> .
Like the Tag to add image here also the src reffers to source of the music file, You must provide the full path of the music location along with the extension of the music file. The autostart attribute in this Tag is to declair if thye music is to start automatically or not when the webpage opens, in the place of x write true to make the music to start start automatically, and write false if you don’t want the music to start automatically. The attribute hidden is to declare if a music player should be shown in the webpage or not, like the one before if the in place of x you write true then a player will be shown on your webpage and if you write false then no music player will be visible on the webpage. The loop attribute is to declare the nos. of time to replay the music that means when the music will end then how many times the full music will repeat after the end of the music, Just write the no of times you want your music to be repeated in the place of #,
Example :- <bgsound src=”D:HTML ProjectCodingHome Page.mp3″ autostart=”true” hidden=”true” loop=”10″>
Suppose we want to add music to our already created webpage, then we just need to add the Music Tag just after the closing of the Font Tag, and the Tag should be written on a new line. Thus the Coding now should look like the below one :
<html>
<head>
<title>
Test Page
</title>
</head>
<body bgcolor=”Blue”>
<img src=”D:HTML ProjectCodingProcessor 2.jpg” align=”right”/>
<font color=”Green” size=”6″>
<h1>HTML Power</h1>
</font>
<font color=”Red” Size=”4″>
<b><i><u>Hi I’m a Newbie to HTML and this is My first created Webpage</u></i></b><br>
<i>I Like Using HTML to create my Own Webpage</i>
</font>
<bgsound src=”D:HTML ProjectCodingHome Page.mp3″ autostart=”true” hidden=”true” loop=”10″>
</body>
</html>

Adding Hyperlink To Your Webpage In HTML :

This the most important and interesting and useful feature of any Webpage no matter what whos webpage it is. Hyperlink is term that we generally know as Link within a website. A Hyperlink attaches or links on pages to another so that the webpage viewer can easily go from one page to another, and for any web designer it’s a must know thing. We can create one or more Hyperlinks on our webpages using HTML. The Tag used for creating Hyperlink is
<a href=”Full path of the webpage to link with”>The name to be showed on the webpage on which the people will click</a> .
Here The Full path means the location of the another webpage which I’m creating link with, and the path also must contain the extension of the another webpage (xyz.html) . Ander the Name to be showed on screen means it’s the name to be displayed on the computer screen and which will represent the another Linked webpage.
Example :- <a href=”D:HTML ProjectCodingHardware.html”>Hardware</a>
A <br> Tag is must be added in the previous element to end the line and to show the Hyperlink in a New line.
Suppose we want to add link to a webpage called Hardware.html just after the Texual part of the our previously created webpage, to do so we just need to put the Hyper linking Tag just after where the Font Tag ends. In the case of our created Webpage the whole coding look like the one given below :
<html>
<head>
<title>
Test Page
</title>
</head>
<body bgcolor=”Blue”>
<img src=”D:HTML ProjectCodingProcessor 2.jpg” align=”right”/>
<font color=”Green” size=”6″>
<h1>HTML Power</h1>
</font>
<font color=”Red” Size=”4″>
<b><i><u>Hi I’m a Newbie to HTML and this is My first created Webpage</u></i></b><br>
<i>I Like Using HTML to create my Own Webpage</i><br>
</font>
<a href=”D:HTML ProjectCodingHardware.html”>Hardware</a>
<bgsound src=”D:HTML ProjectCodingHome Page.mp3″ autostart=”true” hidden=”true” loop=”10″>
</body>
</html>

Now at the end of this Tutorial I guess You can now surely Add Musics, Images and also Add Links to your Webpages.On my next article I show you How to Create Tables and create listed sentence in HTML.

 If there are any question, suggestions or any other comment(s) on your mind then please leave your comment(s), Your Comment(s) are really valuable to me for making my Blog better and better. Have A Good Day.

Follow Techno Genome at :-

How To Make Bold ,Italic, Underlined Fonts And Headings In HTML

How To Make Bold ,Italic, Underlined Fonts And Headings In HTML

HTML Web Page Designing
In this Article I will show you How to make Bold, Italic and Underlined Fonts in HTML. I will also show you How to change to new line and How to create Table in HTML.
But if you don’t know how to create a webpage then first read my previous article
 Now we should concentrate on the current article.

How To Make Fonts Bold, Italic, Underlined In HTML :

In a article sometimes it’s important to make some words or sentences in a another Font style so that the viewers can easily notice those important portions of an article, thus we use Bold, Italic and Underlined Fonts. Like I have given the above Heading in Bold and Underlined style. As we already know there are several Tags available in HTML and those are used for different purposes. So it’s obvious that is also Tags for getting Bold, Italic, Underlined Fonts. I’m going show them to you one by one.
Bold Fonts ====>  To get Bold Fonts we use the Tag <b> , and after this Tag all the written text will be in Bold. To close the Bold Font style we use the Tag with / sign thus the Tag is </b>. The all Textual part written in between <b> and </b> will be in Bold Font style.
Example : – <b>Hi I’m a Newbie to HTML and this is My first created Webpage</b>
Thus If we use the last coding from our previous article and if want to make the Textual part of that webpage only Bold then the whole Coding will look like this :
<html>
<head>
<title>
Test Page
</title>
</head>
<body bgcolor=”Blue”>
<font color=”Red” Size=”4″>
<b>Hi I’m a Newbie to HTML and this is My first created Webpage</b>
</font>
</body>
</html>
Italic Fonts ====>  To Get Italic Fonts the Tag used is <i>  and as the before one here also all the written Textual things after the Italic Tag will be in Italic style. The closing Tag for Italic style is </i> and all the written Textual part between <i> and </i> will be in Italic style.
Example :- <i>Hi I’m a Newbie to HTML and this is My first created Webpage</i>
Thus if we want to make the textual part of our created webpage only in Italic style then the whole coding will be :
<html>
<head>
<title>
Test Page
</title>
</head>
<body bgcolor=”Blue”>
<font color=”Red” Size=”4″>
<i>Hi I’m a Newbie to HTML and this is My first created Webpage</i>
</font>
</body>
</html>

Underlined Fonts ====> The Tag used for creating Underlined Fonts is <u>  and all the texual part written after this Tag will be Underlined. The closing tag for the Underline Tag is </u> and all the Texual content between <u> and </u> will be underlined

Example :- <u>Hi I’m a Newbie to HTML and this is My first created Webpage</u>
Now if we want to make the textual part of our previously created webpage only Underlined the whole coding of the webpage will be like the given one :
<html>
<head>
<title>
Test Page
</title>
</head>
<body bgcolor=”Blue”>
<font color=”Red” Size=”4″>
<u>Hi I’m a Newbie to HTML and this is My first created Webpage</u>
</font>
</body>
</html>
We can also use all 3 Font styles altogether or in any combination of them. To make the Textual part of our previously created webpage Bold, Italic and also Underlined, then we have to use the Tags for those different styles together.
Example :-  <b><i><u>Hi I’m a Newbie to HTML and this is My first created Webpage</u></i></b>
Now if we want to make the Texual part of our previously created webpage altogether then the whole Coding will look like the below one :
<html>
<head>
<title>
Test Page
</title>
</head>
<body bgcolor=”Blue”>
<font color=”Red” Size=”4″>
<b><i><u>Hi I’m a Newbie to HTML and this is My first created Webpage</u></i></b>
</font>
</body>
</html>

Creating Headings and Going To Next Line In HTML :

Creating Headings ====>   Sometimes we also need to create a Heading to keep one topic separate from the others. So we need to give Headings to different Topics. In HTML we can also give Headings by using <h1> Tag. Here in the Tag the 1 declares the Heading number, it can be 2,3,4,5……… etc. according to the counting of the Heading number starting from the first Heading of the page (e.g. For the first Heading use <h1> , For the Second Heading <h2> , For the Third Heading <h3> and so on……..)
To close the Heading Tag we should place the <h1> Tag right after the end of the Texual part of the Heading. So the Textual Part in between <h1> and </h1> will be treated as Heading.
Example :- <h1>HTML Power</h1>
Now suppose you want to add the above heading just before the Textual part in the webpage we have created previously. And let us also provide another different Font Scheme for this Heading, like Colours and Size. To do so let us first add a Complete Font Tag just before the previously created Font Tag :
Example :-  <font color=”Green” size=”6″>
                  </font>
Now insert the Heading Text with Proper Heading Tags in between this newly created Font Tag.
Now the code will be :  <font color=”Green” size=”6″>
                                  <h1>HTML Power</h1>
                                  </font>
Now insert this whole Code just before the previously created Font Tag in the our Webpage Coding, so the whole Coding will be like as below :
<html>
<head>
<title>
Test Page
</title>
</head>
<body bgcolor=”Blue”>
<font color=”Green” size=”6″>
<h1>HTML Power</h1>
</font>
<font color=”Red” Size=”4″>
<b><i><u>Hi I’m a Newbie to HTML and this is My first created Webpage</u></i></b>
</font>
</body>
</html>

Going To Next Line ====>  There is a problem in HTML that is even you will type the Textual Content of the webpage Designed with HTML in a new line from the previous one then it also the Textual part will show in the same line after compilation of the Codings into HTML Page. For example :
</font>
<font color=”Red” Size=”4″>
<b><i><u>Hi I’m a Newbie to HTML and this is My first created Webpage</u></i></b>
<i>I Like Using HTML to create my Own Webpage</i>
</font>
Here we have added a new line of textual content in our previous Coding, so if we compile it along with all other required codes and run the I Like Using HTML to create my Own Webpage line should appear in a new line after the Hi I’m a Newbie to HTML and this is My first created Webpage line, but in real it will not. so it means there needs to be done something to put both text in different line. There is a Tag which is used for ending a line, thus after that tag the next textual content will be displayed on a new line not in the previous same line. The Tag for ending a line is <br> . To end the line the Tag must be used at the end of the line or where you want to end a line and go to the next one after that Tag. For example :
</font>
<font color=”Red” Size=”4″>
<b><i><u>Hi I’m a Newbie to HTML and this is My first created Webpage</u></i></b><br>
<i>I Like Using HTML to create my Own Webpage</i>
</font>
Now if we compile the above code with other required codes and run it the we will see that the line Hi I’m a Newbie to HTML and this is My first created Webpage and I Like Using HTML to create my Own Webpage are displayed in two separate lines.
Now if we want to modify our previous Webpage code to add some more textual part in a new line then the whole Coding will be :
<html>
<head>
<title>
Test Page
</title>
</head>
<body bgcolor=”Blue”>
<font color=”Green” size=”6″>
<h1>HTML Power</h1>
</font>
<font color=”Red” Size=”4″>
<b><i><u>Hi I’m a Newbie to HTML and this is My first created Webpage</u></i></b><br>
<i>I Like Using HTML to create my Own Webpage</i>
</font>
</body>
</html>

Now You I Hope at the end of this Tutorial you can now give your Font different styles and Formats. In the Next Article I discuss about Adding Images, Music and Linking another webpages to a Webpage.

 Please feel free to leave any suggestions, Comment(s) or any Questions. Your Comment(s) is/are very important for me. Have Good Day.

Follow Techno Genome at :-

How To Create Webpage in HTML Tutorial

How To Create Webpage in HTML Tutorial

HTML Coding
HTML stands for Hyper Text Markup Language. The term HTML is related to the world of Internet and it’s used in Webpage Designing. Although there are several language to create an and Webpage but the Basic is the HTML. By Default every Computer  at present are able to create webpages using HTML, and it doesn’t require you to install any software from external source as it’s built into the system. The Basic coding with HTML Language is pretty easy and You will be able to create a webpage right after you read this full tutorial. First you should all know that creating a webpage doesn’t mean that people will be able to see it on the Internet, Untill you let your webpages to be hosted by a Server. Basically to show and create a Website there are two sequential part, the first one is to create a Webpage and the next one is to make that webpage to be Hosted by a Server. Here in this article we will concentrate on performing the first part that is creating the Webpage. We will use HTML to create the Webpage.
Now to start We need to create a New Text file, to do so just follow the steps
Go to Start > Programs/All Programs > Accessories > Notepad.
No the Notepad is open with it’s white page. We will write the Coding of our Webpage over Here.
In HTML we use different word or group of words within ‘<‘ and ‘>’ like <html>, <body>, <body bgcolor=”Blue”> etc. These are known as Tags. There are several Tags available in HTML. In this article I would use few of those Tags and make you learn how to use them properly and how to properly code HTML.
Now back to the point where I left it on Notepad it was a Blank page.Now lets Start :
Now to start HTML coding thus creating a Webpage we need to first start the coding by writing <html> and as to end the coding at the last of all coding is complete we use </html> To complete and to end the webpage Coding, Now If we Concentrate on the Tags we would notice that at the start there was no /  this sign but as to end the coding we just added / sign at the starting of the word within the bracket of the Tag. so to end a Tag just add a / this sign just before the word within the tag.
Example =====> <html> to </html> , <body> to </body> etc.
 So after writing the <html> the HTML coding has just started and the computer will now decode the  all the codes right after the tag as HTML webpage not as simple text.
Now after starting the HTML coding we need to construct our Webpage. At first we need to give a page Title and Heading of the webpage which will be shown at the top of the browser and we also need to construct the Body of the Webpage. To accomplish the given task we will use the following Tags : <head> , <title> , <body> .
Now just after starting the HTML coding after the <html> tag write the tag <head> and <title> one after another, all tags should be used in separate line.
We are so far written :
<html>
<head>
<title>

Now we need to give a title to our webpage, suppose we give the Title as ” Test Page ” , to do so we just need to writhe this page title on the very next line of the <title> tag, and after writing the Title on the line after we need to close the Title Tag by using a / sign before the tag and writing it to declair that the title is the written part which lise between the <title> and </title>. As here the Title of the Page and Heading is the same thus we also need to close the <head> tag right after closing the <title> tag, so this far our coding should look as below :
<html>
<head>
<title>
Test Page
</title>
</head>
We should clearly notice and better I would say understand one thing properly that how the tags are being closed in a rhythm, The Tag which opened last is closing firstly and the Tag which opened at first would close at last. That means the openning of a Tag and closing of the Tags occurs in a oppsite order.
The as the Title of the page is given we need to construct the body of the page like Background Colour, Font Colour, Font Size, Font Properties like Bold, Italic, Underline etc.
Now as you see to construct various parts of the page we have already used various Tags, thus for creating the body of the page there is also a Tag just to start the Body Construction, that is <body>, but to keep the coding short we give the Tags of constructing the body part and the background colour of the Webpage as a combined Tag, that is <body bgcolor=”xyz”> , here in we need to replace the xyz part of the tag with the prefered Background Colour like Blue, Green, Yellow. We can also use Coloure Codes for different colures and different shades of colour, I will let you know where to find those colour codes in the end of this Short Tutorial.
Now let us assume we wanna make the background of the our Webpage to be Blue, so we need to add the Combination of the Body Tag on the very next line in the Notepad where I left it last, the whole code should now look as below
<html>
<head>
<title>
Test Page
</title>
</head>
<body bgcolor=”Blue”>
Now after declairing the Background colour we need to give the information about the Fonts on the Webpage, thus we need to use another Tag that is required. The Tag is <font color=”xyz” size=”#”>  here we need to replace the xyz with the prefered colour code or colour name of the Font and # with the prefered Font size, the font sizes ranges from 1-7. By default the Normal font size is 3 thus if we not give the Font Size part the Font Size would set to 3 automatically.
Now assume that we want Our Font Colour to be Red and the Font Size to be 4, so we need to add the Font Tag after the lastly written Code,  so our Code now should look like this :
<html>
<head>
<title>
Test Page
</title>
</head>
<body bgcolor=”Blue”>
<font color=”Red” Size=”4″>
Now completed giving the Instructions of Page colour and Font Colour and size. So we can Now Insert Text on our webpage. To insert text on the webpage just write the Text you want to insert On a new line after the Font Tag. Suppose You want to Insert the fololowing Text in the webpage ” Hi I’m a Newbie to HTML and this My first created Webpage ” , then just write Hi I’m a Newbie to HTML and this My first created Webpage on a new line right after the Font Tag. So our Code now look like something this :-
<html>
<head>
<title>
Test Page
</title>
</head>
<body bgcolor=”Blue”>
<font color=”Red” Size=”4″>
Hi I’m a Newbie to HTML and this My first created Webpage

Now we have written the Textual par of our website so if we want to show only this text in the given font colour and size then we need to tell the Computer that, so we now have to close the Font Tag to let the computer know that we have completed all of our Textual part of the Webpage. To close the Font We already know from the above experience that which Tag is tobe used. . . . . . Yes you got it the </font> Tag. so we need to add this on a new line, now the whole coding looks like :
<html>
<head>
<title>
Test Page
</title>
</head>
<body bgcolor=”Blue”>
<font color=”Red” Size=”4″>
Hi I’m a Newbie to HTML and this My first created Webpage
</font>
Now we have closed all the Tags but the Body and HTML Tag is still open, now as the the Body Construction of our Webpage is completed therefore we can now close the Body tag by using </body>. And after that we need to close the HTML Tag finally to complete the whole Coding, as I already mentioned erlier that the order of closing Tags is oppsite in the order of Openning Tags thus as the HTML Tag was opened at first and way before the Body Tag, so the HTML Tag must closed at last and after closing of the Body Tag. So Now Our Codings should look like this in the below :
<html>
<head>
<title>
Test Page
</title>
</head>
<body bgcolor=”Blue”>
<font color=”Red” Size=”4″>
Hi I’m a Newbie to HTML and this My first created Webpage
</font>
</body>
</html>
Now our Coding part is fully Completed, now we need to save it and complile it in a HTML Format. To do so just go to Save As from File Menu, and then give a suitable Name of the File and just add .html extension to it, like Code Testing.html and then in the File Type Options from the below select All Files and then Click On Save Button thus saving the file. Now close all the open window and go to the location where you saved the file and run it by Double Left Muse Button Clicking on it.
Now You see How to create a Webpage in HTML, it’s really easy isn’t it. Hope This article was good enough to make you learn. This was just a basic and the most simple HTML Coding, On the Next Article I will discuss about How to Add Images, Music into Your HTML Webpages and How to Insert a Link (Creating Hyperlink) in HTML.

 If you find this article to be Helpful or if you have any Suggestions or Questions Please Do leave Your Comment(s), Any Comments will be highly appreciated. Wish You A Good Day.

Follow Techno Genome at :-

Computer Not Starting And It’s Solutions

Computer Not Starting And It’s Solutions

Computer Problem, Computer Failure
MOOD WHEN COMPUTER DOESN’T WORK
If we use Desktop Computer then most us surely have faced this problem few times or at least once in the life span. Occasionally it happens that Desktop Computers doesn’t take startup. As nowadays computer has become a pretty much important part of live as it makes our life much easier and also it plays a very important role in our professional life. There are various startup problems for computer I listed few of them with their symptoms along with their solutions.

After Switching on No Display on screen and Beep….Beep Sound from Cabinet:

This seems to be a problem of Hardware related to RAM. To solve the Problem follow the steps stated below :
  1. Switch off all switches of computer and disconnect it from electric supply.
  2. Open the Cabinet from one side with the help of a Screw Driver.
  3. Now bring out the RAM Chip from the Motherboard.
  4. With a help of soft painting brush clean the RAM Slot on Motherboard gently.
  5. Hold the RAM chip on a flat clean surface and with the help of a eraser rub on the golden area of the RAM chip which are situated at the bottom edge of the RAM. Clean the both side of the chip with eraser.
  6. Now with a clean paper clean the rubbed area of RAM chip.
  7. Now put the RAM Chip back into the slot on motherboard and fixed it properly and fixed the slot clip on both side of the slot.
  8. Close the Cabinet.
  9. Connect the Power Cable and Power On the System again and try to Start the computer.
**** If the computer still doesn’t starts and the Beep……Beep…….sounds comes out then that means you need to change your RAM and it has malfunctioned or damaged or your Motherboard’s RAM Slot is damaged and you have to change the RAM or Motherboard. I suggest you should also try the whole procedure but putting back the RAM on the other RAM Slots of the Motherboard.

After Switching On the Computer No Display On Screen and also No Beep………Beep…….. Sounds from Cabinet but the CPU Fan is Running:

This seems to be a Hardware related problem, most probably caused by RAM and/or Add-on Cards. To be able to start the Computer again just follow the steps given :
  1.     Turn all switches related to Computer Off and disconnect the computer from electric supply.
  2. Open the one side of cabinet with help of a proper screw driver to have access to the Motherboard.
  3. Bring out RAM and all Add-On Cards from the slots of the Motherboard carefully.
  4. Now clean the RAM and all other Add-On Cards with the method mentioned earlier in this article.
  5. Clean all the Slots of the Motherboard with a soft painting brush carefully.
  6. Now connect the computer to power source and start it and see what happens.

a) If No Beep Sounds Comes Out :

It means either the Motherboard is damaged or there is a short circuit within the Cabinet and the Motherboard.
Now disconnect all connections to power supply and Now unscrew the Motherboard from the Cabinet and disconnect all the connection except the CPU portion and the Cabinet speaker and put it over e foam of mattress and then reconnect only the power cables of the SMPS with it.
Now power on the computer motherboard by connecting the SMPS with power source and turning the electric supply, then short the connector pins of the Power Switch of Cabinet on the motherboard with the help of the metallic part of the screw driver. Now if Beep…….Beep………Sounds comes out then it means that the Motherboard is working properly and either the Cabinet or the Processor is faulty and Creating all the problems. But it’s rare that the Processors become faulty so I recommend the Cabinet should be changed as it’s causing some short circuit the Motherboard. If after changing the Cabinet it doesn’t work out then you should give a try with another Processor. If there are no sounds coming out it means that the Motherboard is not working properly and it needs to be changed.

b) If Beep……Beep…… Sounds Comes Out :

It means The Motherboard is working well and till the connections so far there is no short circuits between the Cabinet and the Motherboard.
Now disconnect all the connections to electric supply and put the RAM on the proper RAM Slot and fix it properly and then start the computer again, if Beep….Beep….. sounds comes out then reset the RAM on the other available slot and then turn on the system again. if there is still sounds of Beeps coming out then it means the RAM is faulty and it needs to be changed. If there is no sounds coming out then look if system starts properly.
Now if the System works now fully correct then just turn it off and disconnect from power source and now put only one of the Add-On Card on the Motherboard but except the Graphics Card if there is any.
Now turn On the System again and see if it’s staring again properly. If the System stops starting again then it means that lastly added Add-On Card has the problem and you may replace it or not use it.
If the System Start again properly then again follow the above procedure and add another Add-On Card on the Motherboard and start the system. Add all of the Add-On Cards one by one until the system stops Starting again and that means if the system stops starting again the last added Add-On Card is creating the fault.The Graphics Card should be added at the last, after putting all other Add-On Cards On the Motherboard.

After Switching On the Computer No Display On Screen and also CPU Fan is Not Running and No Power LED Light is Turned On of the Cabinet :

This Problem Occurs mainly due to the either or any combinations of the following – Faulty Power Source, Faulty UPS, Faulty SMPS, Faulty Cabinet Switch.
To solve this problem follow the steps given :
  • Check the main power source to which UPS is connected.
  • If the Power Source is good then check the UPS by connecting a good working Bulb (say 100watt) to the Output Power Source of the UPS and then turning on the UPS. If the Bulb turns On Brightly then the UPS is working properly. If not then the UPS is faulty.
  • When the UPS is connected to the SMPS then Turn on main power and the UPS and then try to start the computer by short circuiting the power switch pins on the motherboard. If the computer doesn’t start then the SMPS might be faulty to be confirmed You should test the SMPS Multimeter for Rated output of the SMPS.
If the Computer starts by above procedure then after disconnecting the computer from all power sources then at first connect the Cabinet Power Switch Connector to the proper Pins on the Motherboard, and connect all the Power Sources properly and the Start the Computer and then if it not Starts then it means the Power Switch of the Cabinet is damaged and needs to be changed.

Follow Techno Genome at :-

All Commands Of Net BIOS

All Commands Of Net BIOS

NetBIOS

Net BIOS Commands List ======>

  1. NET ACCOUNTS 
  2. NET HELP 
  3. NET SHARE 
  4. NET COMPUTER 
  5. NET HELPMSG 
  6. NET START 
  7. NET CONFIG 
  8. NET LOCALGROUP 
  9. NET STATISTICS 
  10. NET CONFIG SERVER 
  11. NET NAME 
  12. NET STOP 
  13. NET CONFIG WORKSTATION 
  14. NET PAUSE 
  15. NET TIME 
  16. NET CONTINUE 
  17. NET PRINT 
  18. NET USE 
  19. NET FILE 
  20. NET SEND 
  21. NET USER 
  22. NET GROUP 
  23. NET SESSION 
  24. NET VIEW 
  25. NET HELP SERVICES lists some of the services you can start. 
  26. NET HELP SYNTAX explains how to read NET HELP syntax lines. 
  27. NET HELP command | MORE displays Help one screen at a time. 

Follow Techno Genome at :-