Field Tests Of Building Materials

Field Tests Of Building Materials

Field test of brick, cement, sand and stone chips are very much essential as they are the most common construction materials which are used in almost all of the civil engineering construction from brickwork to floor finishing everywhere. As a civil engineer, working in a site is the challenging one, as on the site engineer all the responsibility and liabilities depends upon for good quality construction.  But alone a good supervision is not enough for a good construction having required properties and durability. A proper quality control is essential at all the stages, specially at the very start , where we have to select right materials for a type of construction, as the materials are the cell of each structure. A Civil Engineer may not always have the facility of laboratory at the site for the testing of materials so as to ascertain the quality of a material weather it is bad or good, suitable or not. So a civil engineer should be able to judge the quality of the basic construction materials such as Brick, Cement, Sand and Stone Chips by means of Visual Inspection of those materials, which can be done by doing the Field Test on those materials. Here I’ve listed the different field tests for basic construction materials which becomes necessary in day to day work.


How To Check If A Brick Is Good? ==>

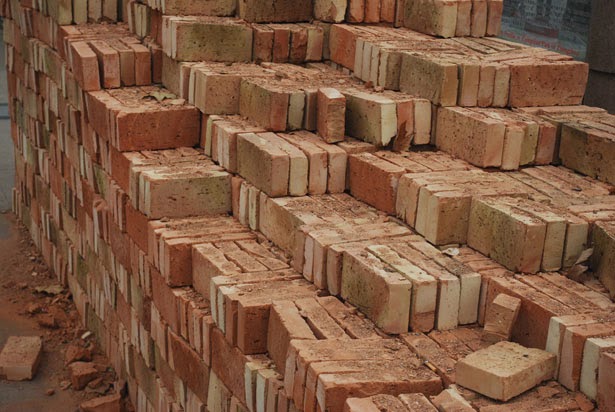
Brick Stack
BRICK STACK


The following field tests are to be performed in order to determine if a Brick is good :-

  1. A good brick should be of proper shape and standard specified size, the edges of it should be sharp, there should not be any cracks and fissures on the brick. 
  2. The colour of a good brick should be copper red colour. A yellowish tint on brick indicates that it is under burnt and hence possessing of lower strength, and if a brick is of dark blackish blue colour then it indicates the brick is over burnt and is brittle in nature. 
  3. When a brick is struck by a hammer or against another brick, it should emit a clear metallic ringing sound, it should not be dull. 
  4. A freshly fractured brick should show a homogeneous compact structure without any lumps. 
  5. If a brick is dropped from about a height of 1m on a hard ground or on another brick, it should not break. 
  6. When a brick is scratched with finger nail it should not leave any impression on the brick. 
  7. A good brick (1st Class) should not absorb water by not more than 20% of its own Dry weight when immersed in water for a period of 24 Hours.

How To Check If Cement Is Good? ==>

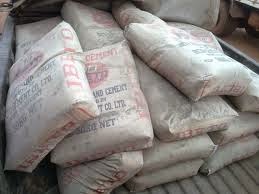
Cement Test
CEMENT STACK
 
The following field tests should be performed to determine if the cement is of good quality :-
  1. The cement should be of Greenish Gray colour for Ordinary Portland Cement, and Blackish Gray colour for Portland Pozzulana Cement and Whitish Gray colour for Portland Slag Cement.
  2.  There should not be any hard lumps on cement, the cement should be finely powdered. If cement contains hard lumps, then it must be rejected. 
  3. The cement when rubbed between fingers should feel smooth, it should not feel granular. If it is granular then it means adulteration with sand. 
  4. A cement paste should feel sticky in between fingers. 
  5. When hand is dipped into a heap or into a bag of cement, it should feel cool, not warm. 
  6. If a hand full of cement is thrown into a bucket of water, the cement should sink, not float as the Specific Gravity of Cement is greater than that of Water. 
  7. If a thick cement paste made on a glass and immersed in water should set, not crack.


How To Check If  Sand Is Good? ==>

Good Quality Sand
GOLDEN YELLOW SAND, A SIGN OF GOOD QUALITY SAND


The following tests should be performed to determine the quality of Sand :-
  1. The Sand should be free from organic impurities and mineral salts, The maximum permissible quantity of organic impurities should be restricted to 5%. 
  2. The Sand should be of Golden Yellow colour. 
  3. The Sand particles should be sharp and angular to increase the interlocking property between the sand particles. 
  4. The sand should coarse for Concreting and medium sand may be allowed in brickwork and is preferable for plastering works.
 

How To Check If Stone Chips Are Good? ==>

 
Stone Chips Stack
STONE CHIPS STACK
The visual tests or field tests for Coarse aggregate, that is stone chips are very limited though there are many laboratory tests are available. Mainly the following things are observed as for Field Test :-
  1. The Stone Chips are to be well graded to increase the mechanical interlocking between them. 
  2. Stone Chips should be Angular as far as possible and be porous. 
  3. The Stone Chips should not be flaky and elongated. 
  4. The Stone Chips should not contain organic and other impurities, as only 5% clay content in concrete can reduce the strength of the concrete as much as 20%.
 
 
I hope this article will help you in your day to day work, as a Civil Engineer I feel these small little things are very much important as a good material is inevitably necessary to produce good construction. Taking care of these small things can turn out great results, which otherwise may not be achieved by higher designing standards. Quality control is the key to the construction, as the Ingredient of good quality will surely produce better taste isn’t it?.

In my next article I will discuss about the Top 10 Faults which are done by mason, and which are mostly ignored by the engineers but which may cause disastrous results in the ultimate structure.
Any comments will be highly appreciated, and praying to all of you to share this page link in your network to spread this words, as it is very important from all of us, and Being a Civil Engineer it is our responsibility to construct a structure which are safe and also durable without compromising. Join Techno Genome if you like this article as your presence is the Key Strength of Techno Genome. Keep Visiting MyCivil – Civil Engineering Redefined at MyCivil.engineer. you can find me in Facebook Techno Genome Page and at Twitter, and can connect me at LinkedIN also.


If you like this Article then I am sure you will like the following well researched articles too, come on check them out also

Come Connect with me On Social Media

Field Tests Of Building Materials

Concrete Cube Test To Determine Concrete Strength

Concrete Cube Testing to determine the strength of concrete can be done in both Destructive and Non-Destructive Methods of Testing. In Civil Engineering Jobs, Civil Engineering Construction Practice Cube test is one of the vital test which is performed to determine the strength of concrete which has been already used in the construction. Cube Testing is a Destructive Testing Method of Concrete Testing, as the cubes are crushed in Compression Testing Machine. The mostly tested cubes in practice are of 150x150x150 size in mm.
Here is How to Do The Cube Test Of Concrete.

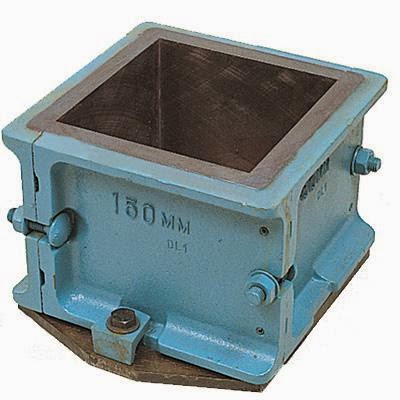
Concrete Cube Mould
150x150x150 mm. CUBE MOULD

Apparatus :-

  • 150x150x150 mm. cube moulds 6 Nos.
  • Slide wrench 1 No.
  • Trowel 1 No.
  • 600mm long and 16mm Dia. Temping Rod 1No.
  • Nail 1 No.
  • Water Tank 1 No.
  • Steel Rule 1 No.
  • Compression Testing Machine
  • Soft Cloth 1 No.
  • Mallet 1 No.
  • Lubricating agent.

Raw Materials :-

Freshly prepared concrete that is Green Concrete which is to be tested.

Procedure :-

  1. First of all measure the mould for its Length, Breadth and Height all inner to inner dimensions accurately with the help of the steel rule.
  2. If there is any dimensions which deviates from Length x Breadth x Height = 150x150x150 mm. then loosen the nut bolts of the mould with the help of slide wrench and adjust it to the perfect 150x150x150 mm and tighten the nut and bolts again.
  3. Now lubricate the inside of the mould thoroughly with lubricating agent, which may be engine oil or Grease.
  4. Then pour the green concrete to be tested into the mould with trowel in Three Layers of each having height approximately 50mm so that three layers fulfill the cube mould as 50+50+50 = 150 mm. after pouring each layer, compact that layer with the help of the Temping Rod with the bullet  ended side stroking into the concrete for 35 Strokes.
  5. After Pouring each layer into the mould, struck the mould from outside on all four wall moderately with the help of mallet so that no honeycombs forms at the contact surface of the Concrete and the mould.
  6. After pouring all three layers according to the step 4 and 5, now trim of the top of the mould and finish it smooth with the help of trowel.
  7. Prepare 6 moulds filled with concrete in the same manner.
  8. Leave the moulds about 1 hour, then write the cube nos. as cube 1 cube 2……cube 6 and date on which they have prepared on the top surface of the concrete with the help of nail.
  9. After 24 Hours open the moulds by opening the nut bolts with the help of slide wrench and release all the 6 cubes from there moulds, and immerse completely all of these cubes under water in water tank at room temperature that is 28C +/- 2C.
    CUBE BEING TESTED ON COMPRESSION TESTING MACHINE
  10. At 7th day from the date of preparation of cubes take 3 cubes of the 6 cubes and soak the water on them with cloth and test them in compression testing machine, crush the cubes one by one and note the results on the compression testing machine.
  11. Do the same for the remaining 3 cubes at 28th day form the date preparation of the cubes, and note the results on the compression testing machine.
  12. Now calculate the Crushing strength for all cubes from the obtained results in terms of N/mm^2 by the following :-

The top surface area of each cube at Top is 150×150 = 22500 mm^2
suppose a cube tested at 7 days crushed at a loading of 310 KN then the Calculation will be as follows
30 KN = 310×1000 N = 310000N
Hence the Crushing Strength of that cube is
( Load at Crushing/Surface Area of Cube in Contact) = (310000/22500) = 13.78 N/mm^2

I hope now you will not have any problem on Concrete Crushing Strength Test. For any question or other comments please leave below in the comments section.

If you like this Article then I am sure you will like the following well researched articles too, come on check them out also

Come Connect with me On Social Media

Field Tests Of Building Materials

Water Absoption Test Of Bricks – Laboratory Method

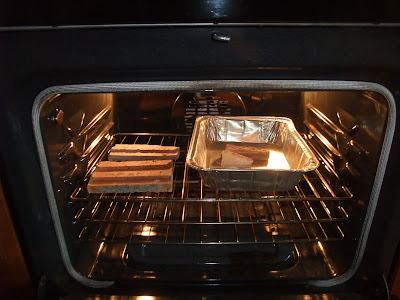
Bricks Kept For Drying In Hot Air Oven

Aim :

To determine the water absorption capacity of a brick as per IS: 3495 (Part II)-1992.

Theory:

The water absorption of bricks is not related directly to the porosity owing to the nature of pores themselves. Some of Pores may be through pores which permit air to escape in absorption tests and allow free passage of water in absorption tests, but other are completely seated and inaccessible to water under ordinary conditions. For this reason it is seldom possible to fill more than about three quarters of pores by simple immersion in cold water. For measuring total absorption the boiling method is adpted. More is the water absorption capacity weaker is the brick and vice versa.

Apparatus :

  • Drying Oven
  • Balance
  • Immersion Tank etc.

Procedure :

  1. Select five bricks at random.
  2. Dry the specimen in a drying oven at a temparature of 110’C to 115’C for 24hrs.
  3. Remove the Bricks from the oven and cool them to room temperature and obtain it’s weight W1(kg)
  4. Immerse the five bricks completely in water at 27’+/-2’C for 24hrs.
  5. Remove the specimen and wipe out any traces of water with a damp cloth and weigh the specimen within three minutes after it’s removal from water. Let its weight be W2 (kg).
  6. Water Absorption Capacity in terms of percentage by weight is given by  (((W2-W1)/W1)*100)
  7. Take the Average Value of water absorption capacity.

Observations and Calculations :

 Sl. No.   Oven Dry wt. of specimen(W1)    Wet wt. of specimen(W2)    Water Absorption   Remarks

1

2

3

4

5

[N.B.: The water absorption capacities for various classes of bricks should not exceed the following :

1st Class Brick ==> Not more than 20% by weight
2nd Class Brick ==> Not more than 22% by weight
3rd Class Brick ==> Not more than 25% by weight ]

Follow MyCivil at :-

Field Tests Of Building Materials

The Brick Test For Quality Assurance


Bricks of Bad Quality Broken by Falling from a height of 1 metre
 

Aim:

To check the quality of bricks regarding (i) Size, (ii) Shape, (iii) Colour, (iv) Hardness and Soundness (v) Density as per IS: 1077-1992, 3495-1992

Specifications:

Size : The standard size of common building bricks traditionally used in West Bengal (248 mm x 121 mm x 70mm) and modular bricks 190 x 90 x 90 mm. Usually the length of bricks should be twice the width plus one mortar joint.
Shape : First class bricks should be truly rectangular in shape with smooth faces, straight and sharp edges. Edges should be at right angle at corners.
Colour : A well brunt-brick should be uniform ‘brick-red’ colour. A pale colour indicates under burning. A bluish colour indicates over burning.
Hardness and Soundness : First class bricks should have a fine compact and uniform texture. It should be hard, strong and durable. It should give a metallic sound when struck with a hammer or another brick. When dropped down from a height of one metre on another brick resting on ground it should not break. A freshly fractured should not show any cracks, fissures, hole, lump or pebbles etc.
When scratched with a finger nail, if no impression in left on the surface, the brick is assumed to be sufficiently hard.
Density:
Find the density of brick taking mean weight and mean volume. Equipment:
Steel tape, metre scale, Try-square, balance, drying oven etc.
Procedure :
1.  Take 20 whole bricks at random from the stack, and all blisters, loose particles of clay and small projections shall be removed. 
2.  Arrange 20-numbers of full size bricks lengthwise leaving no gap in between and measure the total length. Repeat the measurement three times and take the mean.Get the length of single brick by dividing the mean by 20. 
3.  Take three such measurements by keeping the bricks breadthwise. Find the breadth of single brick as before. 
4.  Likewise find the height of single brick by arranging heightwise. 
5.  Record the result in table No. 1.
6.  Observe the faces, edges and colour of the bricks and note the observation.
7.  Take one brick in your left hand and strike with a hammer or another brick and note the sound. Allow a brick to fall a height of 1 metre on another brick resting on ground and see if it breaks. 
8.  Break one or two bricks and examine for the texture. 
9.  Scratch the brick surface with thumb-nail, observe whether any mark is left on the surface.
Observation and Results:            
Size :
Table I

Trials        Trial -1       Trial-II      Trial III     Mean of 3     Mean of 20-bricks    Remarks

                                                                                                  
Length
Breadth
Height
Final Size:
Shape : Condition of
(i)     Faces –
(ii)   Edges –
Colour:
Striking Sound : Emits metallic sound / Emits dull sound
Result of dropping from a height of one meter : Break / Does not break
Texture : Uniform and closely grained / Non uniform-existence of cracks, fissure, holes, lumps of lime, pebbles etc.
Hardness : Finger nail impression – yes/no

Follow MyCivil at :-