Home Made Waterproofing Compound

Home Made Waterproofing Compound

Today I’m here going to discuss about how to make waterproofing compound by self at the site during the construction with cheaply available materials. I know it has been a long time since my last article, and maybe you, who are following Techno Genome regularly know the reason behind that, anyways let us concentrate on today’s topic. First of all we have to understand what a Waterproofing Compound is, and why it is required in a Civil Engineering Construction works.

Waterproofing, Water Proofing Compounds, Waterproofing Methods
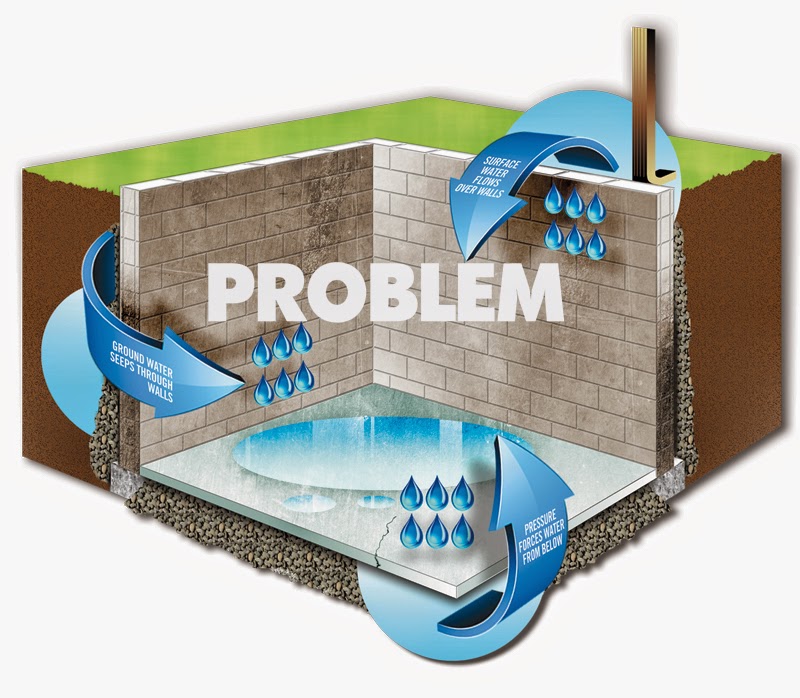
ENTRANCE OF WATER IN BUILDING
A Waterproofing compound is nothing but a chemical in the form of liquid or powder which when mixed with concrete or mortar during their preparation, makes that concrete or mortar impermeable to the moisture so that the moisture cannot penetrate through the fine pores of the concrete or mortar surfaces.

Now we must understand why a civil engineer should resort to water proofing compound, and what benefits it can provide for that extra expenditure which will be needed for using the water proofing compound or a water proffer.
See actually every concrete surface or mortar surface has got fine pores throughout its body, which are known as the capillary pores. No matter how rich the concrete mix is, no matter how well compacted it is, there will be capillary pores, which are simply unavoidable, so when ever you will give some water on the exposed concrete surface or mortar surface you will notice that the concrete or mortar surface will be absorbing the moisture. Now the fact is what is the problem which will occur if the absorption capabilities exists on concrete or mortar surface? The actual problem lies in the fact that concrete and mortar surface not only absorbs moisture but also carbon di oxide and also other gasses and acids which will penetrate through the surface of concrete or mortar surface and mixing with the moisture it will form the respective acids of them and thus mainly two things can happen depending on the fact that whether it is a Reinforced Concrete or Plain Concrete. Suppose it is a Plain Concrete without any reinforcements then what will happen that those acidic solutions will dissolve the hardened cement compounds and will decay the concrete, and if it is RCC that is Reinforcements are there within the concrete, then the moisture and oxygen which penetrates through the body will cause the rusting of the steel reinforcement. So to cope up with this problem the best way is that we must not allow the moisture to enter into the hardened concrete or mortar surfaces, and to resist the moisture from entering through the surface pores. In case the heavy moisture enters into mortar it may cause even electrical short circuit. A Waterproofing Technique also helps in proper curing of the concrete by preventing the moisture from escaping from the inside of the concrete to the atmosphere.


What a Waterproofing Compound does is that it seals off the pores on the concrete and mortar surface by producing some chemical substances which forms due to the reaction of Water Proofing Compound with the Water and the reaction products seals the pores with insoluble products and blocks the moisture from entering through the pores.
But the most important fact is that though this chemical, that is Waterproofing Compounds are required in small quantity about 2% but being costly in many unimportant cases or in cases where due to any reason it is not possible to use a Branded Waterproofing Compound at places where it must be used, then What will we do?????
Yes, We are going to make it by our self, in the following manner. I’ve arranged it in simple manner without any complexities, Let us see.

Ingredients :

  1. Cement : Sand = 1:2 by volume
  2. Pulverized Alum @ 120 N per cu.m. of sand that is 12 kg per cu.m. of sand
  3. Soft Soap @0.75 N or 75 gm. per Lit. of Water

Procedure :

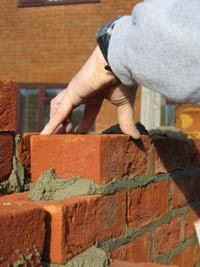
  • Take Required Quantity of Cement and Sand in the proportions of 1:2 by volume.
  • Dry mix them well until a good texture is achieved which have to be judged by eyes that the mixing has been done enough.
  • Add Alum in Powder form which can be done by crushing the Regular Alum bought from Hardware stores, and add it to the dry cement-sand mix at the rate of 12 kg per cu.m. of the sand in that dry mix.
  • Now prepare the mixing water , first determine the amount of water required for producing a mortar of workable consistency, then add Soft Soap (Beauty Soap maybe used which are used for bathing) at the rate of 75 gm. per Lit. of water. and mix the water thoroughly with the soap.
  • Now use this soap water and add it to the dry cement-sand-alum mix and prepare the mortar.
  • Now this mortar has become a Waterproofing Mortar, use it on the surface of Concrete as a plaster or use for regular plastering works where Waterproofing is required.

But always remember it should be used in case only when it is not possible to use Branded Waterproofing Compounds, and on works which are not of major importance, as in adverse conditions it will not have the same power of resisting as a branded waterproofing compound.
Hope all of you would like this article, please do comment and share your thoughts on this article and on Techno Genome. and please do share the web address of Techno Genome that is www.technogenome.com in your circle of people and in your Social Networking pages to help in growing this site, Your one help may help others in finding these informative articles and also a growth to this site, or else these efforts are all wastes as it would not help others. Thank You for Your Visit. Keep Visiting Techno Genome for more and more like Articles, Have a Good Day.

If you like this Article then I am sure you will like the following well researched articles too, come on check them out also

Come Connect with me On Social Media

Home Made Waterproofing Compound

Brickwor Quality Control

Here I’ve listed the most important factors which are to be taken care of while doing Brickwork of any nature structural brickwork or face lifting works in brickwork for better appearance. These points mentioned below should always be taken care strictly in the site of construction for achieving a long lasting durable structure.

Brickwork
    • The bricks should be of 1st class quality for structural works, or atleast of 2nd class quality in unavoidable circumstances, but those 2nd class bricks must posses atleast 60% of the field quality checks of bricks.
    • The bricks should be immersed in water for a continuous period of 2 hrs for best results, or atleast 1 hr for satisfactory results, but anything less than this can cause total loss of bond strength of the mortar due to the absorption of water from the mortar to the water hungry dry bricks.
    • Brickwork should be done for a maximum height of 1.5 m in a day, and nest continuation should be started only after the brickwork previously done achieves sufficient strength to hold the load without squeezing out of the mortar from the newly prepared brick joints of brickwork.
    • In case of doing brickwork of half brick thick brick walls or construction of brick on edge like 5″, 3″ or 4″ wall construction H.B. Netting should be done on every third layer, or the wall may fall down.
    • Mortar should be of proper proportion and consistency as required for different types of brickwork.
  • The mortar which has been prepared must be used within its Initial Setting Time, that is  a period of 30 minutes for OPC and Blended Cements like PPC, PSC.
  • Brickwork should be cured well for a period of atleast 7 days for good results.
  • Brickwork should be raised in a manner of uniform level in height throughout its length, suppose  a wall is to be raised on the next layer of brickwork, then it should be done only after finishing the brickwork throughout the length in the current layer.
  • Brickwork should be done in proper bonding.
  • In Brickwork there must not be vertical joints in continuation, it must be be alternatively arranged by atleast overlapping one fourth portion of the brick above and below.
  • Nothing less than Half Bats shall be used
  • Connection between two walls of different alignment must be done with toothing in brickwork.

If you like this Article then I am sure you will like the following well researched articles too, come on check them out also

Come Connect with me On Social Media

Home Made Waterproofing Compound

Ready Mix Concrete A Approach To Modern Concreting

Ready Mix Concrete is one of the most advancement in concreting industry today. The concrete whose constituents are weigh batched at a central batching plant, mixed either at the plant itself or in Transit Mixer, and then transported to the construction site and delivered in a condition ready to use is what called as Ready Mixed Concrete or RMC.This enables the place of the manufacture and use of concrete being separated and connected by suitable transportation method. This type of concrete is useful in congested sites or at diverse work places and saves the consumer from the headache of acquiring materials for preparing concrete. RMC is made under factory conditions and in a controlled state  hence this is more durable and economical in terms of proper utilisation of the ingredients of concrete. The RMC can be produced according to the required properties such as Strength, Workability, Setting Time etc.

Ready Mixed Concrete
DISCHARGE OF READY MIXED CONCRETE FROM THE TRANSIT MIXER

Proportioning of the Ready Mixed Concrete :-

The Ready Mixed Concrete proportioning aims at obtaining an economical and practical combination materials to produce concrete with required properties for its intended use, such as workability, strength, durability and appearance. The following basics of a good concrete mix should be considered :-

  1. Concrete aggregates are required to meet appropriate specification.
  2. Fly Ash and other supplementary cementing materials which enhances the properties of concrete are normally added to the RMC. Least amount of water which can produce required workability must be used.
  3. Admixtures are commonly used in small quantities varying from 0.5% to 2% for improving properties of both fresh and hardened concrete such as setting time, workability, rate of strength development etc. mainly Water Reducers are used like Naptha Base, PCE or Polyvinyl Carboxylic Ether.


Production Of Ready Mixed Concrete :- 

First of all Concrete Mix Design is done to obtain the required mix proportions for the required strength and workability. Ready Mixed Concrete can be produced using any efficient concrete mixer including paddle mixer, free-fall mixers and truck mixers, but forced action mixers are generally preferred. Ready-made self-compacting concrete may take longer time to obtain complete mixing than for normal concrete due to reduction of frictional force and to fully activate the superplasticizer.
Admixtures should not be added directly to the dry constituent materials but dispensed together with or in the mixing water. Different Admixtures should not be blended together prior to adding.
The preferable procedure is to load the aggregates first together with cement, and this immediately followed by the main mixing water and superplasticizer.

Classification of Ready Mixed Concrete :- 

1)Transit Mixed Concrete :-
  • Concrete mixed at job site while travelling to the job site the drum is turned at agitating speed that is slowly. After arriving at the job site, the concrete is completely mixed. The Drum of the Transit Mixer is turned for 70 to 100 revolutions, or about five minutes at mixing speed.
  • Concrete mixed in the yard or central batching plant the drum is turned at high speed or 12-15 rpm for 50 revolutions. This allows a quick check of the batch. The concrete is then agitated slowly while driving to the job site.
  • Concrete mixed in transit the drum is turned at the medium speed or about 8 rpm for 70 revolutions while driving to the job site. The drum is then slowed to agitating speed.
 2) Shrink-mixed Concrete :-
  • Concrete that is partially mixed at the central batching plant and then discharged into the drum of the truck mixer for completion of the mixing is called Shrink-mixed Concrete.
3) Central-mixed Concrete :-
  • In this case concrete is fully mixed and prepared in the Central Batching plant and then carried to the job site by the truck mixers.

If you like this Article then I am sure you will like the following well researched articles too, come on check them out also

Come Connect with me On Social Media

Home Made Waterproofing Compound

Specification Of Paint Complete In All Respect

All surfaces of painting shall be properly sand papered and papered and cleaned and where necessary good quality putty shall be used to hide all holes, cracks, open joints etc. The rate for painting includes such work.
PaintsPaint shall be applied with approved brushes and surfaces shall be sand papered after every coat. All work when completed shall present a smooth, clean solid and uniform surface, to the satisfaction of the Engineer-in-Charge.
  •  Primer: all surfaces for painting, if they are new, should have a coat of priming before application of the paint. Old surfaces where existing paints have been completely worn out owing to long use should also receive a coat of priming before application of fresh painting.
          I.Wood primer: wood primer of approved brand and manufacture is to be applied on the wooden surface which would be free from moisture and loose particles.
         II. Steel Primer: For steel surface red oxide primer, zinc chromate primer of approved brand and manufacture and as per direction of the engineer-in-Charge is to be applied on the surface. The surface should be made free of grease, rust, moisture and loose particles.
        III.Cement Primer Coat (Alkali Resisting Primer): Cement primer coat is to be used as base coat on wall finish of cement, lime or lime cement plaster or on asbestos cement surface before application of any wall coating e.g. oil bound distemper, oil based paints, synthetic enamel, plastic emulsion etc. on them. The cement primer is composed of a medium and pigments which are resistant to the alkalis present in the cement, lime or lime cement in wall finish and provides a barrier for the protection of subsequent coats of oil bound distemper or paints. Priming coat shall be preferably applied by brushing and not by spraying. Hurried priming shall be avoided particularly on absorbent surface. New plaster patches in old work before applying oil bound distemper paints etc. should also be treated with cement primer. The surface shall then be allowed to dry for a last 48 hours. It shall then be sand papered to give a smooth and even surface. Any unevenness shall be made by applying putty, made of plaster of paris mixed with water on the entire surface including filling up the undulation and then Sand papering the same after it is dry. The cement primer shall be applied with a brush on the clean dry and smooth surface. Horizontal strokes shall be given first, vertical strokes shall be applied immediately afterwards. The entire operation will constitute one coat. The surface shall be finished as uniformly as possible leaving no brush marks. It shall be allowed to dry for at least 48 hours before oil bound distemper or paint applied.

  •  Synthetic Enamel Paint: Synthetic enamel paint of approved brand and manufacture and of the required shade shall be used for the top coat and an undercoat of shade to match the top coat and an undercoat of shade to match the top coat as recommended by the manufacture shall be used. Undercoat of the specified paints of shade suited to the shade of the top coat shall be applied and allowed to dry overnight. It shall be rubbed next day with the-fine grade of wet abrasive paper to ensure a smooth and even surface free from brush marks and all loose particles dusted off. Top coats of specified paint of the desired shade shall be applied after the undercoat is thoroughly dry. Additional finishing coats shall be applied if found necessary to ensure properly uniform glossy surface.
  • Aluminium Paint: Aluminium paint of approved brand and manufacture shall be used. The paint comes in compact dual containers with the paste and the medium separately. The two shall be mixed together to proper consistency before use. Each coat shall be allowed to dry for 24 hours and lightly rubbed down with fine grade sand paper and dusted before the next coat is applied. The finished surface shall present an even and uniform appearance. As aluminum paint is likely to settle in the container, care shall be taken to frequently stir the paint during use. Also the paint be applied and laid off quickly, as surface is otherwise not easily finished.
  • Plastic (Acrylic) Emulsion Paint: Plastic (Acrylic) emulsion paint are not suitable for application on external surface and surface which are liable o heavy condensation and are to be used generally on internal surface. For plastered surfaces a cement priming coat is required before application of plastic emulsion. Plastic emulsion paint of approved brand and manufacture and of the required shade shall be used. The paint will apply with usual manner with brush or roller. The paint dries by evaporation of the water content and as soon as the water has evaporated the film gets hard and the next coat can be applied. The time for drying varies from one hour on absorbent surfaces to 2 to 3 hours on non-absorbent surfaces. The thinning of emulsion is to be done with water and not with turpentine. Thinning with water will be particularly required for the undercoat which is applied on the absorbent surface. The surface on finishing shall present a flat, velocity, smooth finish. If necessary more coats will be applied till the surface present a uniform appearance.
  • Varnishing: Varnish for the undercoat shall be a flatting varnish of the same manufacture as the top coats. New wood work to be varnished shall be finished smooth with a carpenter’s plane. Knots shall be cut to a slight depth. Cracks and holes shall be applied liberally with a full brush and spread evenly with short light strokes to avoid frothing. If the work is on the upstroke so the varnish shall be crossed and re-crossed and then laid off, the later being finished process will constitute one coat. If the surface is horizontal, varnish shall be worked in every direction with light quick strokes and finished in one definite direction so that it will set without showing brush marks. Rubbing down and fatting the surface shall be allowed to dry away from draughts and damp air. The finished surface shall then present a uniform appearance and fine not be poured back into the stock tin, as it will render the latter unfit for use. Special fine haired varnishing brushed shall be used and not ordinary paint brushes. Brushes shall be well worn and perfectly clean.
  • Oiling with Raw Linseed Oil: Raw linseed oil shall be lightly viscous but clear and of a yellowish colour with light brown with light brown tinge. Its specific gravity at a temperature of 30 degree C shall be between 0.293 and 0.298. The oil shall be mellow and sheet to the very little smell. The oil shall be of sufficiently matured quality. Oil turbid or brick, with acid and bitter taste and rancid odour and which remains sticky for a considerable time shall be rejected. The oil shall be of approved brand and manufacture. The wood work shall be cleared of all smoke and water and completely dried. The oil shall be applied freely with brushes (not rags) and spread evenly and smooth until no more oil is absorbed. Each subsequent cost shall be applied after the previous coat is thoroughly dried and in any case not before 24 hours of application of the first coat. Work after completion shall not be patchy and sticky to the touch and shall present a uniform appearance.
  • Wax polishing: Wax polishing shall be done with material of approved brand and manufacture. Preparation of surface will be same as for Varnishing. The polish shall be applied evenly with a clean pad of cotton cloth is such a way that the surface is completely and fully covered. The surface is then rubbed continuously for half an hour. When the surface is quite dry, a second coat shall be applied in the same manner and rubbed continuously for half an hour or until the surface is dry. The final coat shall then be applied and rubbed for two hours(more if necessary) until the surface has assumed a uniform gloss and is dry, showing no sign of stickiness. The final polish depends largely on the amount of rubbing which should be continuous and with uniform pressure with frequently changes in the direction.

  •  French polishing: Pure shellac varying from pale orange to lemon yellow colour, free from resin or dirt shall be dissolved in methylated spirit at the rate of 150gm. Of shellac to a litre of spirit. Suitable pigment shall be added to get required shade. The surface shall be cleaned. All unevenness shall be rubbed down smooth with sand paper and well dusted. Knots if visible shall be covered with a preparation of red lead and glue size laid on while hot. Holes and indentations on the surface shall be stopped with glazier’s putty. The surface shall then be given a coat of wood filler made by mixing whiting (ground chalk) in methylated spirit at the rate of 1.4 kg. of whiting per litre of spirit. The surface shall again be rubbed down perfectly smooth with glass paper and wiped clean. A pad woolen cloth covered by a fine cloth shall be used to apply the polish. The pad shall be moistened with the polish and rubbed hard on the wood in a series of overlapping circles applying the mixtures sparingly but uniformly over the entire area of an even level surface, a trace of linseed oil on the face of the pad facilities this operation. The surface shall be allowed to dry and the remaining coats applied in the same way. To finish off, the pad shall be covered with a fresh piece of clean fine cotton cloth, slightly damped with methylated spirit and rubbed lightly and quickly with circular motions. The finished surfaced surface shall have a uniform texture and high gloss.
  • Flat Wall Painting: The priming coat shall consist of “Distempering Primer or Cement Primer”. The flat wall paint shall be approved brand and manufacture and of required shade. The surface shall be prepared as described in sub-head “Cement Primer Coat”. Flat wall paint shall normally be applied on walls 12 months after their completion (in case of new work), in which case distemper primer will be sufficient. If the walls are to be painted earlier the primer coat shall consist of cement primer.

When the surface is dry, painting with the wall in uniform and even layers will be done to the required number of coats. Each coat shall be allowed to dry overnight and lightly rubbed with very fine grade of sand paper and loose particles brushed off before the next coat is applied. If after the final coat of wall paints the surface obtained is not up to the mark, further one of or more coat as required shall be given to obtain smooth and even finish at the cost of contractor. If primer or wall paint gets thickened it shall be thinned suitably with the thinner as recommend by manufacture.

Home Made Waterproofing Compound

Steel Door And Window Specification

  • Materials :Steel doors and windows shall be manufactured using rolled steel sections of the weights specified in IS: 1038 latest issue. They shall be fixed, centre hung, top hung, bottom hung or composite as specified. The steel shall be of ST. 32-0 grade conforming to IS: 1977 or latest issue

Steel Window And Frame

  • Size : The steel doors and windows shall be according to the specified sizes and design. The sizes of doors and windows shall be calculated so as to allow 1.25 cm clearance on all four sides of openings to allow for easy fitting of door, windows and ventilators into opening. The actual sizes of doors, windows and ventilators shall not vary by more than 1.5 mm from those given in drawing.
  • Fabrication:Both the fixed and opening frames shall be constructed of sections which have been cut to length and mitred. The comers of fixed and opening frames shall be welded to form a solid-fused welded joint conforming to the requirements given below. All frames shall be square and flat. The process of welding adopted may be flash or butt welding or any other suitable method which gives the desired results.
  • Requirements Of Welded Joints: Visual inspection test:- When two opposite corners of the frame are cut, paint removed and inspected, the joint shall conform to the following :
                                 I.            Welds should have been made all along the place of meeting members.
                                II.            Welds should have been properly ground, and
                              III.            Complete cross section of the corner shall be checked up to see that the joint is completely solid and there is no cavity visible.
  • Micro And Macro Examinations:  From the two opposite corners obtained for visual test, the flanges of the sections shall be cut with the help of a saw. The cut surfaces of the remaining portions shall be polished, etched and examined. The polished and etched faces of the weld and the base metal shall be free from cracks and fairly free from under cutting, overlaps, gross porosity and entrapped slag.
  • Fillet Weld Test:  The fillet weld in the remaining portion of the joint obtained shall be fractured by hammering. The fractured surfaces shall be free from slag porosity, crack, penetration defects and fusion defects.
  1. Door: The hinge pin shall be of electro-galvanised steel of suitable thickness and size. In the case of doors, the first closing leaf shall be the left hand leaf locking at the door from the push side. The first closing shutter shall have a concealed steel bolt at top and bottom. The bolts shall be so constructed as not to work loose or drop by their own weight .Single and double shutter door shall be provided with a three way bolting device. 
  2. Windows : For fixed windows the frames shall be fabricated as described in fabrication. But side hung windows for fixing steel hinges slots shall be cut in the fixed frame and hinges inserted inside and welded to the frame. The hinges shall be of projecting types the hinge pin shall be of galvanised steel. Friction hinges shall be provided for side hung windows shutters if specified. The handle plate shall be welded, screwed or riveted to the opening frame in such a manner that it should be fixed before it is glazed and should not be easily removable after glazing. The handles shall have a two point nose which shall engage with a brass striking plate on the fixed frame in a slightly opened position as well as in the closed position.The boss of the handle shall incorporate a friction device to prevent handle from dropping under its own weight and the assembly shall be so designed that the rotation of the handle may not cause it to unscrew from the pin. The strike plate shall be so designed and fixed in such a position in relation to the handle that with the latter bearing against it stop, there shall be adequate light fit between casement and outer frame. In case where non-friction type hinges are provided, the windows shall be fitted with peg stags which shall be either of black oxidised steel or as specified, 300 mm long with steel peg and locking brackets. The pegs stay have three holes to open the side hung casement in three different angles. Side hung casement fitted with friction hinges shall not be provided with a peg stay.
  • Galvanising :  All steel surfaces shall be thoroughly cleaned of rust, scale and dirt. Where so specified, the steel surfaces shall be treated for rust-proofing by the hot dip, zinc spray or electro-galvanising process. The rate shall be exclusive of final finishing coats but shall include the priming coat. 
  • Fixing:  Where openings are flush and with a rendered finish a clearance of 1.25 cm shall be provided between the steel frame and opening. In the case of external masonry finish “Fair-Faced” and with rebated “jambs” a minimum 1.25 cm clearance between frame and opening shall be provided.
Home Made Waterproofing Compound

Specification Of Wood Work According To I.S. Code Of Practice


A) Wood Work for door and window frames : –

a)       Materials :Timber shall be of teak, sal, deodar etc  as mentioned, well seasoned, dry, free from sap, knots, crack or any other defects or diseases. It shall be sawn in the direction of the grains. Sawing shall be truly straight and square. The scantling, shall be planned smooth and accurate to the full dimensions, rebates, rounding and mouldings as shown in the drawing made, before assembling. Patching or plugging of any kind shall not be permitted except as provided.
b)       Joints: These shall be mortise and tenon type, simple, neat and strong. Mortise and tenon joints shall fit in fully and accurately without wedging or filling. The joints shall be glued framed, put together and pinned with hardwood or bamboo pins not less than 10 mm dia. after frames are put together pressed in position by means of a press.
c)       Surface Treatment: Wood work shall not be painted, oiled or otherwise treated before it has been approved by the Engineer-in-Charge. All portions of timber abutting against masonry or concrete or embedded in ground shall be painted with approved wood primer or with boiling coal tar.
d)       Gluing Of Joints : The contract surface of tenon and mortise joints shall be treated before putting together with bulk type synthetic resin adhesive of a make approved by the Engineer-in-Charge.
e)       Fixing In Position : The frame shall be placed in position truly vertical before the masonry reaches half highest of the opening with iron clamps or as directed by the Engineer-in-Charge. In case of door frames without sills, the vertical members shall be embedded in the flooring to a depth of 40 mm or as directed by the Engineer-in-Charge. The door frames without sills while being placed in position, shall be suitably strutted and wedged in order to prevent warping during construction. The frames shall also be protected from , during construction.

B)Wood work for door and window shutters: –

a)       Materials:Specified timber shall be used, and it shall be well seasoned, dry, free from sap, knots crack or any other defects or disease. Patching or plugging of any kind shall not be permitted except as provided.
b)       Joinery Work :All pieces shall be accurately cut and planned smooth to the full dimension. All members of the shutters shall be straight without any warp or bow and shall have smooth, well planned faces at right angles to each other. In case of panelled shutters the corners and edges of panels shall be finished as shown in the drawings, and these shall be feather tongued into styles and rails. The panels shall be framed into groovers to  the full depth of the groove leaving an air space of 1.5 mm and the faces shall be closely fitted to the sides of the groove. In case of glazed shutter, sash bars shall have mitred joints with styles. Styles and rails shall be properly and accurately mortised and tenoned. Rails which are more than 180 mm in width shall have two tenons. Styles and end rails of shutters shall be made out of one piece only. The tenons shall pass through styles for at least 3/4th of the width of the style. When assembling a leaf, styles shall be left projecting as a horn. The styles and rails shall have 12 mm groove in panelled portion for the panel to fit in.
The depth of rebate in frames for housing the shutters shall in all cases be 1.25 cm and the rebate in shutters for closing in double shutter doors or windows shall be not less than 2 cm. The rebate shall be splayed. The joints shall be pressed, and secured by bamboo pins of about 6 mm diameter. The horns of styles shall be sawn off
c)       Battened Shutters : Plank for battens shall be 20 mm thick unless otherwise specified and of uniform width of 125 to 175 mm. These shall be planned and made smooth, and provided with minimum 12mm rebated joints,. The joint lines shall be chamfered. Unless otherwise specified the battens for ledges and Braces shall be 30 mm thick and fixed with the battens on the inside face of shutter with minimum two number 50 mm long wood screws per batten. The ledges shall be 225 mm wide and braces 175mm wide, unless otherwise specified. The braces shall incline downwards towards the side on which the door is being hung.
d)       Gluing Of Joints For Panelled Or Glazed Shutters:  The contact surfaces of tenon and mortise joints shall be treated before putting together with bulk type synthetic resin adhesive of a make approved by the Engineer-in-Charge. Shutters shall not be painted, oiled or otherwise treated, before these are fixed in position and passed by the Engineer-in-Charge. For glazed shutters, mounting and glazing bars shall be tub-tenoned to the maximum depth which the size of the member would permit or to a depth of 25 mm, whichever is less.

Fittings : Details of fittings to be provided shall be as per the schedule of fittings supplied by the Engineer-in-Charge in each case. The cost of providing and fixing shutters shall include the cost of hinges and necessary screws for fixing the same. All other fittings shall be enumerated and paid for separately. The fittings shall conform to their respective IS specifications. Where fittings are stipulated to be supplied by the department free of cost, screws for fixing the fittings shall be provided by the contractor andnothing extra will be paid for the same.